Navigating Your Entertainment: How to Connect Spectrum DVR Receiver Box to TV
In the dynamic landscape of 2026, home entertainment systems are more integrated and sophisticated than ever before. While streaming services dominate, traditional cable television, especially with DVR capabilities, remains a cornerstone for many households. Understanding **how to connect Spectrum DVR receiver box to TV** effectively is crucial for unlocking a premium viewing experience, ensuring you don’t miss out on high-definition content, seamless recording, and the full suite of features Spectrum offers. This guide is designed to walk you through every step, from initial setup to advanced optimization, ensuring your entertainment hub is perfectly configured for the modern age.
The Evolving Landscape of Home Entertainment in 2026
The year 2026 finds us in an exciting era for home entertainment. Ultra-high-definition content, including 4K and increasingly 8K resolutions, is becoming standard, supported by advanced display technologies like QD-OLED and MicroLED. Connectivity has seen significant advancements with the widespread adoption of Wi-Fi 7 and the continued rollout of robust 5G networks, impacting how we stream and consume media. DVRs, while facing competition from cloud-based solutions, have evolved to offer greater storage, smarter recording algorithms, and deeper integration with on-demand platforms.
Consumers in 2026 expect instant access, intuitive interfaces, and flawless performance from their entertainment devices. The demand for seamless integration between live TV, recorded content, and streaming apps within a single, unified experience is paramount. Spectrum DVRs continue to adapt, offering features that cater to these sophisticated user expectations, making the physical connection process even more critical to leverage these capabilities fully.
Why a Proper Connection Matters for Your Viewing Experience
A correctly executed connection is the bedrock of a superior entertainment experience. Without it, you might face frustrating issues such as poor picture quality, audio dropouts, or even a complete lack of signal. In 2026, where devices boast advanced features like HDR (High Dynamic Range), Dolby Vision, and immersive audio formats like Dolby Atmos, the integrity of your cables and connections directly influences whether you can enjoy these enhancements. A haphazard setup can lead to signal degradation, latency, and an inability to access the full resolution and sound fidelity your equipment is capable of delivering.
Furthermore, a proper connection ensures that your DVR can communicate effectively with your TV, allowing for functionalities like HDMI-CEC (Consumer Electronics Control) that simplify operation with a single remote. This guide on **how to connect Spectrum DVR receiver box to TV** will emphasize best practices to avoid common pitfalls, ensuring you get the crispest picture, the clearest sound, and the most reliable performance from your Spectrum service right from the start.
What This Comprehensive Guide Will Cover
This article will serve as your definitive resource for connecting your Spectrum DVR receiver box to your television, tailored for the technologies and expectations of 2026. We will begin with an essential pre-connection checklist, ensuring you have all necessary equipment and a safe environment. Following this, we will delve into understanding the various ports on your Spectrum DVR and modern TV inputs, highlighting the importance of standards like HDMI 2.1.
The core of the guide will provide a detailed, step-by-step walkthrough on **how to connect Spectrum DVR receiver box to TV**, covering everything from coaxial cable attachment to power-up and input selection. We’ll then move into post-connection configuration, troubleshooting common issues, and optimizing your settings for the best possible audio and video quality. Finally, we will explore advanced features, future-proofing your setup, and tips for enhancing your overall Spectrum DVR experience in this current year.
Essential Pre-Connection Checklist for Your Spectrum Setup
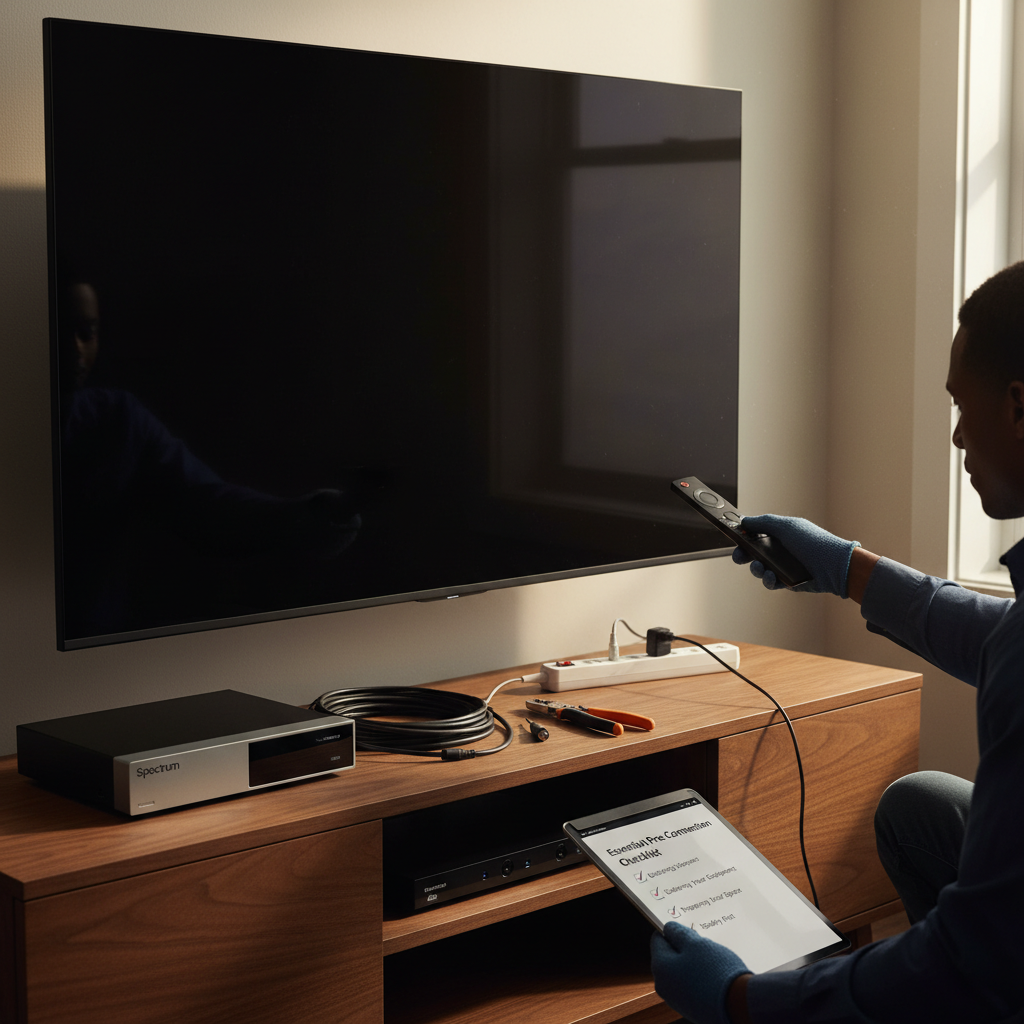
Before you begin the physical connection process, a little preparation goes a long way. Taking the time to gather your tools, prepare your space, and ensure safety will streamline the setup and prevent potential headaches. This pre-connection checklist is specifically tailored for the equipment and standards prevalent in 2026, ensuring you’re ready to learn **how to connect Spectrum DVR receiver box to TV** efficiently and correctly.
Gathering Your Equipment: What You’ll Need (2026 Standards)
To successfully connect your Spectrum DVR receiver box, you’ll need a few key items. First and foremost, you’ll have your Spectrum DVR receiver box itself, usually provided by Spectrum. You’ll also need the power cord for the DVR, which typically comes with the unit. A crucial component is a high-quality HDMI cable; in 2026, this ideally means an HDMI 2.1 certified cable to support 4K, 8K, and advanced features like VRR (Variable Refresh Rate) and ALLM (Auto Low Latency Mode). Avoid older HDMI versions if your TV and DVR support 2.1.
You’ll also require a coaxial cable, typically provided by Spectrum, to bring the signal from your wall outlet to the DVR. Ensure this cable is in good condition, without kinks or frayed ends. If you’re connecting a soundbar or A/V receiver, you might also need an optical audio cable (Toslink) or additional HDMI cables, depending on your audio setup. Finally, gather your TV’s remote control and the Spectrum DVR remote control. Having a small flashlight can also be helpful for seeing ports behind your TV.
Preparing Your Space: Power Outlets and TV Inputs
Before you even think about **how to connect Spectrum DVR receiver box to TV**, assess your entertainment area. Identify an easily accessible power outlet for your DVR and TV. If you have multiple devices, consider using a surge protector to safeguard your electronics from power fluctuations, which are always a good investment in 2026. Ensure there’s adequate space behind your TV for cable management and proper ventilation, as modern electronics can generate heat.
Next, locate the input ports on your television. Most modern TVs in 2026 will feature multiple HDMI ports. Look for labels like “HDMI 1,” “HDMI 2,” and specifically “HDMI ARC” or “HDMI eARC” if you plan to connect a sound system. Familiarize yourself with these labels, as you’ll need to select the correct input later. Clear any dust or obstructions from these ports to ensure a secure connection.
Safety First: Power Down All Devices
Safety is paramount when dealing with electronic connections. Before connecting any cables, make sure both your television and your Spectrum DVR receiver box are completely powered off. It’s even better practice to unplug them from the wall outlet. This prevents any potential electrical shorts, damage to the ports, or accidental shocks while you are handling the cables. This step is a non-negotiable part of learning **how to connect Spectrum DVR receiver box to TV** safely.
Ensure your hands are dry, and work in a well-lit area. Taking these simple safety precautions will protect both you and your valuable electronic equipment. Once everything is powered down and unplugged, you can proceed with confidence to the actual connection steps.
Understanding Your Spectrum DVR Receiver Box and TV Inputs in 2026
To effectively connect your devices, it’s essential to understand the various ports and their functions on both your Spectrum DVR and your television. The technology in 2026 emphasizes high-speed digital connections, but some legacy options might still be present. Knowing what each port does is key to figuring out **how to connect Spectrum DVR receiver box to TV** for optimal performance.
Deconstructing the Spectrum DVR Receiver Box: Ports and Functions
Your Spectrum DVR receiver box, depending on its specific model (e.g., Spectrum’s latest WorldBox 4.0 or similar 2026 models), will typically feature several key ports on its rear panel. The most prominent will be the ‘Cable In’ or ‘RF In’ port, a threaded coaxial connector where the signal from your wall outlet enters. This is fundamental for receiving live television channels.
You’ll also find one or more HDMI output ports. This is the primary digital video and audio output that will connect directly to your TV. Some DVR models might still include older outputs like Component (red, green, blue for video; red, white for audio) or Composite (yellow for video; red, white for audio), though these are rarely used in 2026 for primary TV connections due to their lower quality. Additionally, you might see an ‘Ethernet’ port for wired internet connection (useful for on-demand and updates), and potentially optical audio (Toslink) out for dedicated audio systems. Knowing these ports is vital for learning **how to connect Spectrum DVR receiver box to TV**.
Identifying Modern TV Inputs: HDMI, ARC/eARC, and Legacy Options
Modern televisions in 2026 are primarily equipped with HDMI inputs. These versatile ports carry both high-definition video and multi-channel audio over a single cable. You’ll typically find several HDMI ports, often numbered (HDMI 1, HDMI 2, etc.). One or more of these will likely be labeled “ARC” (Audio Return Channel) or “eARC” (Enhanced Audio Return Channel). An ARC/eARC port is specifically designed to send audio from your TV back to a compatible soundbar or A/V receiver, simplifying cable management for audio systems.
While less common on new, high-end TVs in 2026, some mid-range or older models might still have Component (YPbPr) or Composite (RCA) video inputs. These are analog connections and should be avoided if HDMI is available, as they do not support HD, 4K, or 8K resolutions. USB ports are also common on TVs but are generally for media playback from external drives or powering streaming sticks, not for connecting your DVR. Understanding these inputs is crucial for successfully learning **how to connect Spectrum DVR receiver box to TV**.
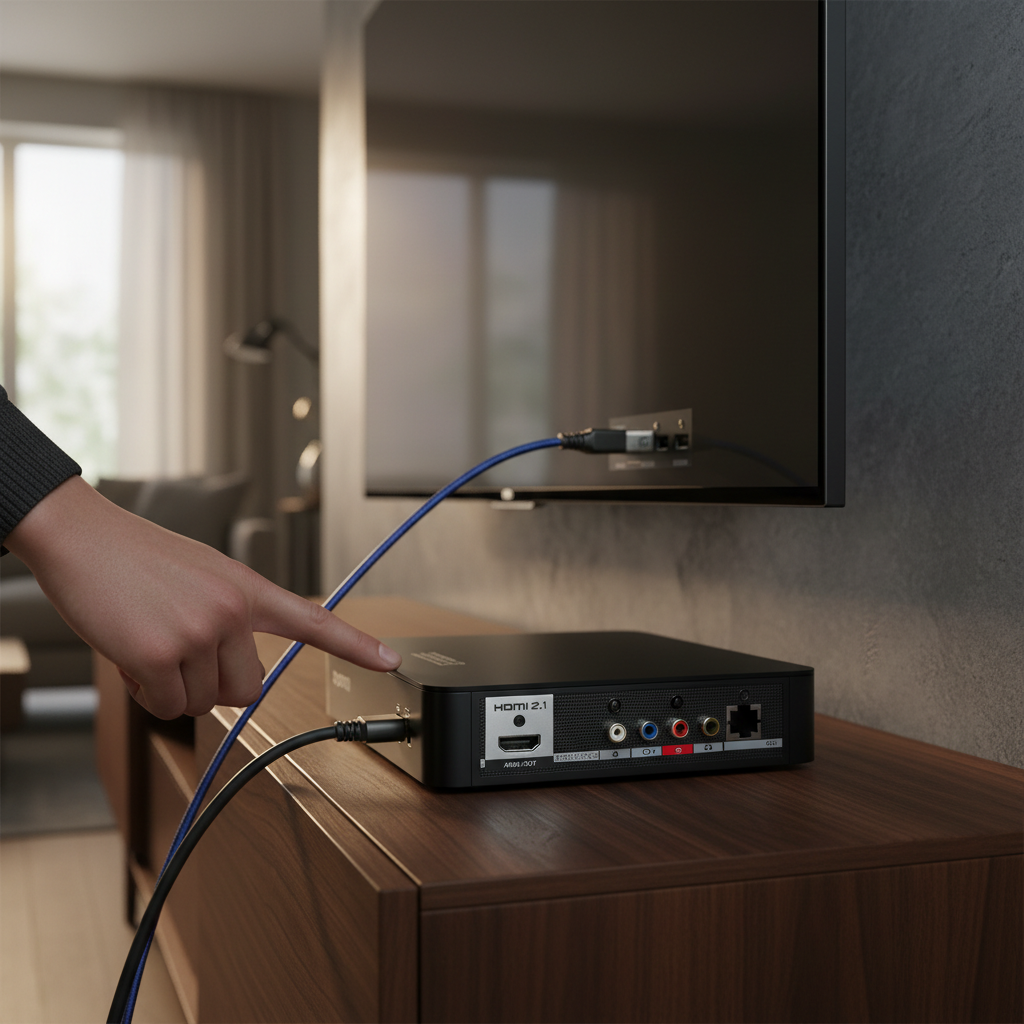
The Importance of HDMI 2.1 and Beyond for Optimal Performance
In 2026, HDMI 2.1 is the reigning standard for high-performance audio and video transmission. It offers significantly higher bandwidth (48 Gbps) compared to previous versions, enabling support for 4K resolutions at 120Hz and 8K resolutions at 60Hz. Crucially, it also introduces features like Dynamic HDR (ensuring optimal contrast and color scene-by-scene), VRR, ALLM, and eARC. If your Spectrum DVR and TV both support HDMI 2.1, using an HDMI 2.1 certified cable is essential to experience the full visual and auditory fidelity available, especially with premium content.
While HDMI 2.1 is the current benchmark, industry discussions are already exploring future iterations that could support even higher resolutions and refresh rates. For now, when you consider **how to connect Spectrum DVR receiver box to TV**, prioritizing HDMI 2.1 ensures your setup is future-proofed for the next several years and capable of delivering the best possible picture and sound quality that 2026 technology allows. Always check your device specifications to confirm compatibility.
Step-by-Step Guide: How to Connect Spectrum DVR Receiver Box to TV
Now that you’ve prepared your equipment and understand the ports, it’s time to physically connect your Spectrum DVR receiver box to your television. This section provides a detailed, easy-to-follow guide to ensure a smooth setup process. Following these steps precisely is key to successfully learning **how to connect Spectrum DVR receiver box to TV**.
Connecting the Coaxial Cable for Signal Input
The first physical connection you’ll make is for the incoming television signal. Locate the coaxial cable wall outlet in your home – it looks like a single round port with a threaded center pin. Take one end of the coaxial cable (usually provided by Spectrum) and screw it clockwise onto this wall outlet until it is finger-tight. Do not overtighten, as this can damage the cable or port.
Next, locate the ‘Cable In’ or ‘RF In’ port on the back of your Spectrum DVR receiver box. Take the other end of the coaxial cable and screw it clockwise onto this port, again ensuring it’s finger-tight. This connection is critical as it provides the live television signal to your DVR. A secure connection here helps prevent signal loss and picture quality issues. This foundational step is crucial for **how to connect Spectrum DVR receiver box to TV**.
The Core Connection Process: How to Connect Spectrum DVR Receiver Box to TV with HDMI
With the coaxial cable in place, the next vital step is connecting the DVR to your TV using an HDMI cable. Take one end of your HDMI 2.1 cable (recommended for 2026 standards) and plug it firmly into the HDMI OUT port on the back of your Spectrum DVR receiver box. This port is specifically designed to send the video and audio signal to your television.
Then, take the other end of the HDMI cable and plug it into an available HDMI input port on your television. It’s generally a good idea to choose a clearly labeled port, such as “HDMI 1” or “HDMI 2,” and note which one you’ve used. If your TV has an HDMI eARC port and you plan to connect a soundbar later, you might reserve that port for the soundbar or connect the DVR to another HDMI input, allowing the eARC to manage audio return. This is the primary method for **how to connect Spectrum DVR receiver box to TV** for high-quality output.
Connecting Power to Your Devices and Initial Power-Up
Once all the signal and video/audio cables are securely connected, it’s time to restore power. First, plug the power cord for your Spectrum DVR receiver box into the ‘Power’ input on the back of the DVR. Then, plug the other end of the power cord into a wall outlet or surge protector. Next, plug in your television’s power cord to its respective outlet.
After both devices are plugged in, power on your television using its remote control. Then, power on your Spectrum DVR receiver box. Some DVRs may power on automatically when plugged in, while others have a power button on the front or top of the unit. The DVR will likely go through an initial boot-up sequence, which can take several minutes as it initializes and acquires the signal. Patience is key during this first power-up when you learn **how to connect Spectrum DVR receiver box to TV**.
Selecting the Correct TV Input (Source) for Your DVR
With both devices powered on, your TV will likely display its default input, which might not be the one your DVR is connected to. Using your television’s remote control, press the ‘Input’, ‘Source’, or ‘TV/Video’ button. This will bring up a menu on your screen listing all available inputs (e.g., HDMI 1, HDMI 2, AV, Component).
Navigate through this menu and select the HDMI input number to which you connected your Spectrum DVR receiver box. For example, if you plugged the HDMI cable into “HDMI 2” on your TV, select “HDMI 2” from the input list. Within a few seconds, you should see the Spectrum logo, a setup screen, or live TV appear on your screen. Congratulations, you’ve successfully completed the basic steps of **how to connect Spectrum DVR receiver box to TV**!
Post-Connection Configuration and Optimization
Connecting your Spectrum DVR to your TV is just the first step. To truly unlock its potential and enjoy a premium entertainment experience in 2026, you’ll need to configure settings, optimize video and audio, and keep your system updated. This section delves into these crucial post-connection steps.
Navigating the Spectrum Guide and User Interface (2026 Edition)
Once your Spectrum DVR is connected and displaying on your TV, familiarize yourself with the Spectrum Guide. The 2026 edition of the Spectrum Guide is highly intuitive, featuring enhanced search capabilities, personalized recommendations powered by AI, and seamless integration with streaming apps. Use your Spectrum remote to navigate through channels, access the program guide, and explore on-demand content.
Spend some time exploring the main menu options, which typically include Live TV, Guide, DVR, On Demand, Apps, and Settings. The modern interface is designed for quick access to your favorite shows and movies, making it easy to manage your entertainment. Understanding this interface is vital for getting the most out of your setup after you’ve learned **how to connect Spectrum DVR receiver box to TV**.
Setting Up DVR Recording Preferences and Schedules
The primary benefit of a DVR is its recording capability. Access the ‘DVR’ section from the Spectrum Guide. Here, you can set up single recordings for upcoming shows, create series recordings for your favorite programs, and manage your recorded library. The 2026 Spectrum DVRs often feature smarter recording logic, prioritizing new episodes and minimizing duplicates.
Explore options to modify recording settings, such as whether to record only new episodes or all episodes, and how long to keep recordings. You can also monitor your available recording space. Efficiently managing your recording preferences ensures you never miss a moment of your preferred content, which is a core part of enjoying your setup once you know **how to connect Spectrum DVR receiver box to TV**.
Adjusting Video and Audio Settings for Best Quality (4K/8K Considerations)
To ensure you’re getting the best picture and sound quality from your Spectrum DVR, especially with 4K and 8K TVs prevalent in 2026, navigate to the ‘Settings’ menu on your DVR. Look for ‘Video Settings’ or ‘Display Settings’. Here, you can typically choose the output resolution (e.g., 1080p, 4K, or 8K, if supported by your DVR model and TV). Set it to the highest resolution your TV supports.
Also, check for HDR settings if your TV and DVR support High Dynamic Range content. For audio, go to ‘Audio Settings’. Ensure the audio output is set correctly for your setup, whether it’s stereo, Dolby Digital, or advanced formats like Dolby Atmos if you have a compatible sound system. Adjusting these settings correctly maximizes your viewing pleasure after you’ve learned **how to connect Spectrum DVR receiver box to TV**. For more on advanced display technologies, see this article on High-dynamic-range television.
Performing System Updates for Enhanced Features and Security
Like all modern electronic devices, your Spectrum DVR receiver box periodically receives software updates. These updates often introduce new features, improve performance, and patch security vulnerabilities. It’s crucial to ensure your DVR is running the latest software version. Most Spectrum DVRs will automatically download and install updates, often overnight, but it’s good practice to check manually sometimes.
Within the ‘Settings’ menu, look for a ‘System Information’ or ‘Software Update’ option. Here, you can usually see the current software version and manually check for available updates. Keeping your system updated ensures you have access to the latest enhancements and maintain optimal system stability and security. This proactive approach helps maintain the seamless operation you expect after learning **how to connect Spectrum DVR receiver box to TV**.
Troubleshooting Common Connection Issues and Solutions
Even with the clearest instructions on **how to connect Spectrum DVR receiver box to TV**, sometimes issues arise. Don’t panic! Many common problems have straightforward solutions. This section will help you diagnose and resolve the most frequent connection and performance hiccups.
“No Signal” or Black Screen: Diagnosis and Fixes
The “No Signal” message or a blank screen is arguably the most common issue. First, double-check that your TV is set to the correct HDMI input (source) where your DVR is connected. Press the ‘Input’ or ‘Source’ button on your TV remote and cycle through the options.
Next, ensure all cables are securely connected. Unplug and re-plug the HDMI cable at both the DVR and TV ends. Do the same for the coaxial cable. Power cycle both the TV and the DVR: unplug them from the power outlet for about 60 seconds, then plug them back in and power them on. This often resolves minor communication glitches between devices. If the problem persists, try a different HDMI cable or a different HDMI port on your TV to rule out a faulty cable or port.
Audio Problems: No Sound or Distorted Audio
If you have a picture but no sound, or the audio is distorted, check your TV’s volume level and ensure it’s not muted. Verify the audio settings on your Spectrum DVR, as mentioned in the previous section, ensuring the output format is compatible with your TV or sound system.
If you’re using a soundbar or A/V receiver, ensure it’s powered on, set to the correct input, and connected properly to your TV (often via the ARC/eARC HDMI port or an optical cable). Again, check all cable connections – the HDMI cable between the DVR and TV, and any audio cables to your sound system. A simple power cycle of all connected audio devices can also resolve temporary audio glitches.
Remote Control Not Responding: Syncing and Battery Checks
A non-responsive remote can be incredibly frustrating. First, check the batteries in your Spectrum remote control. Replace them with fresh ones if they’re low or dead. Ensure there are no obstructions between the remote and your DVR’s infrared (IR) sensor.
If the remote still isn’t working, it might need to be re-paired or re-programmed. Spectrum remotes often have specific codes or pairing procedures. Check the user manual for your specific Spectrum remote model or visit the Spectrum support website for instructions on how to sync it with your DVR. Sometimes, simply removing the batteries for a minute and reinserting them can reset the remote.
Picture Quality Issues: Pixelation, Freezing, or Poor Resolution
Poor picture quality can stem from several sources. Pixelation or freezing often indicates a weak or intermittent signal. Check the coaxial cable connections at both the wall outlet and the DVR – ensure they are tight and the cable isn’t damaged. If you’re using a splitter, try connecting the DVR directly to the wall outlet to rule out the splitter as the cause.
If the resolution seems low, revisit the video settings on your DVR and TV to ensure they are set to the highest possible resolution (e.g., 4K or 8K) that your TV supports. Ensure you are using a high-quality HDMI 2.1 cable. If the issue is widespread across all channels, it might be a broader signal issue from Spectrum, requiring a call to their support. Understanding **how to connect Spectrum DVR receiver box to TV** properly minimizes these issues.
What to Do When All Else Fails: Contacting Spectrum Support
If you’ve tried all the troubleshooting steps and are still experiencing problems, it’s time to contact Spectrum Customer Support. They have tools to diagnose issues remotely and can guide you through more advanced troubleshooting steps or schedule a technician visit if necessary.
Before calling, have your account information ready, and be prepared to describe the problem in detail and list the troubleshooting steps you’ve already taken. This will help them assist you more efficiently. Remember, their goal is to ensure you fully enjoy your service after learning **how to connect Spectrum DVR receiver box to TV**.
Enhancing Your Spectrum DVR Experience in 2026
Connecting your Spectrum DVR to your TV is just the beginning. In 2026, Spectrum offers a rich ecosystem of features and integrations that can significantly enhance your entertainment experience. This section explores how to leverage these advanced capabilities.
Exploring On-Demand and Integrated Streaming Services
Modern Spectrum DVRs are much more than just recording devices; they are integrated entertainment hubs. Access the ‘On Demand’ section through your Spectrum Guide to browse a vast library of movies, TV shows, and special events available for instant viewing. Many of these titles are available in 4K HDR.
Furthermore, Spectrum’s interface in 2026 often integrates popular streaming services directly. You might find apps for Netflix, Disney+, Max, and others directly within your DVR’s menu. This allows for a seamless transition between live TV, recorded content, and your favorite streaming platforms without needing to switch inputs or devices. This integration is a key advantage after you learn **how to connect Spectrum DVR receiver box to TV**.
Utilizing Voice Control Features and AI Assistants
Voice control has become a standard feature in 2026, and Spectrum DVRs are no exception. Many Spectrum remotes include a built-in microphone, allowing you to use voice commands to change channels, search for shows, launch apps, or control playback. This hands-free convenience makes navigating your entertainment much faster and more intuitive.
Beyond the remote, Spectrum is increasingly integrating with popular AI assistants like Amazon Alexa and Google Assistant. This means you can often control your DVR using voice commands through your smart speakers or smart displays, further embedding your entertainment into your smart home ecosystem. Exploring these features significantly streamlines your interaction once you know **how to connect Spectrum DVR receiver box to TV**.
Multi-Room DVR Capabilities and Whole-Home Solutions
For households with multiple TVs, Spectrum offers multi-room DVR capabilities. This allows you to start watching a recorded show in one room and finish it in another, or access your entire DVR library from any connected TV in your home. This is typically achieved through additional client boxes or compatible streaming devices.
Spectrum’s whole-home solutions often involve a central DVR unit that records content, with smaller, client-only boxes (sometimes called ‘mini boxes’ or ‘receivers’) connected to other TVs. These client boxes access the recordings stored on the main DVR, providing a unified entertainment experience across your entire home. This is an advanced consideration beyond just **how to connect Spectrum DVR receiver box to TV**.
Spectrum App Integration for Mobile Viewing and Management
The Spectrum TV App is an indispensable companion to your DVR service in 2026. Available on smartphones, tablets, and even some smart TVs, the app allows you to watch live TV, browse the Spectrum Guide, and access on-demand content from anywhere within your home’s Wi-Fi network. Some features even extend outside the home.
Crucially, the app also provides remote DVR management. You can schedule recordings, delete old shows, and manage your recording schedule directly from your mobile device. This level of flexibility ensures you have control over your entertainment, even when you’re not in front of your main TV, building on the foundation of knowing **how to connect Spectrum DVR receiver box to TV**.
Ensuring Seamless Entertainment: How to Connect Spectrum DVR Receiver Box to TV for Optimal Performance
Beyond the initial setup, maintaining and optimizing your connections and equipment is crucial for long-term, seamless entertainment. This section focuses on best practices to keep your Spectrum DVR running at its peak in 2026.
Best Practices for Cable Management and Organization
Cluttered cables are not only unsightly but can also hinder performance and make troubleshooting difficult. Invest in some basic cable management tools like zip ties, Velcro straps, or cable sleeves. Neatly bundle cables together, separating power cables from video/audio cables to minimize potential interference.
Ensure cables are not tightly coiled or sharply bent, as this can damage the internal wiring and degrade signal quality. Proper cable routing also improves airflow around your devices, preventing overheating. A well-organized setup simplifies future adjustments and enhances the overall aesthetics of your entertainment center, a subtle but important aspect of mastering **how to connect Spectrum DVR receiver box to TV**.
Understanding Signal Strength and Interference Prevention
A strong, clean signal is paramount for optimal picture and sound quality. If you experience frequent pixelation or dropouts, it could be due to poor signal strength or interference. Ensure all coaxial cable connections are tight and that you are using high-quality cables. Avoid unnecessary splitters, as each split can weaken the signal.
Sources of interference can include other electronic devices, power lines, or even poor grounding. If possible, keep your coaxial cable away from power cords and other electrical wires. If you suspect significant signal issues, Spectrum can often test your signal strength remotely or send a technician to assess your home’s wiring. This proactive approach ensures you get the most out of your setup once you know **how to connect Spectrum DVR receiver box to TV**.
Regular Maintenance and Updates for System Longevity
Just like any other electronic device, your Spectrum DVR benefits from occasional maintenance. Periodically dust the vents and ports to prevent dust buildup, which can lead to overheating. Ensure there’s adequate space around the DVR for proper ventilation.
As mentioned earlier, regularly check for and apply system updates. These updates not only add features but also improve stability and address potential bugs, extending the lifespan and performance of your device. A well-maintained DVR is a reliable DVR, ensuring consistent entertainment after you’ve learned **how to connect Spectrum DVR receiver box to TV**. For insights on maintaining digital systems, consider resources like HubSpot’s website maintenance checklist, which offers analogous principles for digital health.
Advanced Audio Setups: Connecting Soundbars and A/V Receivers
For audiophiles or those seeking an immersive home theater experience, connecting a soundbar or A/V receiver is a popular upgrade in 2026. The most common and recommended method is to connect your soundbar or A/V receiver to your TV’s HDMI eARC (or ARC) port. This allows your TV to send audio from all its inputs (including your Spectrum DVR) to the sound system via a single HDMI cable.
Alternatively, you can connect the optical audio output from your TV or DVR directly to your sound system. Consult the manuals for your soundbar/receiver and TV for specific setup instructions, as configurations can vary. Properly integrating an external audio system elevates your viewing experience significantly beyond just **how to connect Spectrum DVR receiver box to TV**. You might also consider advanced solutions like an Iptv Encoder Box for distributing audio and video throughout your home, especially in custom home theater setups.
Future-Proofing Your Home Entertainment Setup with Spectrum
The technology landscape is constantly evolving. In 2026, anticipating future trends and making smart choices today can ensure your Spectrum entertainment setup remains cutting-edge for years to come. This section explores how to future-proof your system.
The Role of 5G and Wi-Fi 7 in Streaming and Connectivity (2026 Context)
In 2026, 5G networks are robust and widely available, offering fiber-like speeds wirelessly, particularly in urban and suburban areas. Wi-Fi 7 (802.11be, also known as Extremely High Throughput) is becoming the standard for home networking, providing unprecedented speeds, lower latency, and greater capacity for multiple devices. These technologies are crucial for high-quality streaming, cloud gaming, and supporting the myriad of smart home devices.
While your Spectrum DVR primarily relies on coaxial cable for live TV, its on-demand features, integrated streaming apps, and system updates are heavily dependent on your home’s internet connection. Ensuring you have a Wi-Fi 7 router and leveraging 5G for mobile viewing (via the Spectrum app) will guarantee a smooth, buffer-free experience for all your digital content, complementing your knowledge of **how to connect Spectrum DVR receiver box to TV**.
Anticipating Next-Gen DVR Features and Services
Looking ahead, DVRs are likely to continue evolving. Expect to see further integration with AI for even smarter content recommendations and predictive recording based on your viewing habits. Cloud DVR solutions, which store recordings remotely, are also growing in popularity, offering virtually unlimited storage and accessibility from any device.
Spectrum is continually innovating, and future DVR models may offer enhanced voice control, deeper smart home integration, and support for even higher resolutions like 16K as displays become available. Staying informed about Spectrum’s announcements and new hardware releases will help you decide when it’s time to upgrade your equipment. Keeping an eye on these developments ensures your understanding of **how to connect Spectrum DVR receiver box to TV** remains relevant.
Smart Home Integration: Connecting Your DVR to Your Ecosystem
The smart home ecosystem is thriving in 2026, and your entertainment system is a key component. As mentioned, Spectrum DVRs are increasingly compatible with AI assistants. You can integrate your DVR into broader smart home routines, such as dimming lights when you start a movie or automatically powering on your TV and sound system with a single voice command.
Consider using smart plugs to control power to your TV and DVR, or smart lighting to create ambiance for movie nights. The goal is to create a cohesive, automated environment where your entertainment system works seamlessly with other smart devices, enhancing convenience and immersion. This takes your setup beyond just **how to connect Spectrum DVR receiver box to TV**.
Upgrading Your Equipment: When and Why to Consider New Hardware
While this guide focuses on **how to connect Spectrum DVR receiver box to TV**, there comes a point when upgrading your hardware becomes beneficial. You might consider a new Spectrum DVR if your current model doesn’t support 4K or 8K, lacks features like HDMI 2.1, or has insufficient storage space for your recording needs.
Similarly, if your TV is an older model that doesn’t support modern display technologies (e.g., HDR, VRR, high refresh rates), upgrading to a 2026-era 4K or 8K smart TV will drastically improve your viewing experience. Keep an eye on technological advancements and your personal usage patterns to determine the optimal time for an upgrade that aligns with your entertainment demands.
Mastering Your Home Entertainment: How to Connect Spectrum DVR Receiver Box to TV Successfully
Embarking on the journey to set up your home entertainment system can seem daunting, but by following a structured approach, you can achieve a flawless connection and unlock a world of content. This comprehensive guide has provided you with all the necessary information, from initial preparation to advanced optimization, specifically tailored for the technological landscape of 2026.
Recap of Key Connection Steps for a Flawless Setup
To recap, mastering **how to connect Spectrum DVR receiver box to TV** involves several critical steps: First, gather all your equipment, including a high-quality HDMI 2.1 cable, and prepare your space by identifying power outlets and TV inputs. Always prioritize safety by powering down all devices before making any connections. Next, connect the coaxial cable from your wall outlet to the DVR’s ‘Cable In’ port. Then, use an HDMI cable to connect the DVR’s ‘HDMI OUT’ port to an available HDMI input on your TV. Finally, plug in and power on both devices, and select the correct HDMI input on your TV. Post-connection, remember to configure video/audio settings, set up DVR preferences, and keep your software updated.
Enjoying Your Personalized and Feature-Rich TV Experience
With your Spectrum DVR receiver box now perfectly connected and optimized, you are ready to immerse yourself in a personalized, feature-rich entertainment experience. Enjoy crystal-clear 4K or 8K picture quality, immersive audio, and the convenience of recording your favorite shows. Leverage integrated streaming apps, voice control, and multi-room capabilities to tailor your viewing to your lifestyle. The seamless blend of live TV, recorded content, and on-demand options puts you in complete control of your entertainment destiny.
Staying Informed with Spectrum Innovations and Support
The world of home entertainment is constantly evolving, and Spectrum continues to innovate with new services, features, and hardware. To ensure you always get the most out of your subscription, stay informed about Spectrum’s latest offerings. Regularly check their website, newsletters, or customer support channels for updates. And remember, if you ever encounter an issue or have questions, Spectrum’s dedicated support team is there to help. By staying engaged and informed, you can continually enhance your entertainment setup, building upon your foundational knowledge of **how to connect Spectrum DVR receiver box to TV**.